If you want to create games in Roblox, you will use a program called Roblox Studio. In Roblox Studio in order to write code you need to know the programming language Lua. The good news is that it is easy to learn the basics of Lua programming, even if you have never written a line of code before. In this article we’ll provide an overview of coding in Roblox with Lua but if you want a deep dive into making games on Roblox check out our free course.
What is Lua?
If you are writing code in Roblox Studio then you are using the Lua programming language. Lua is very easy to learn due to its simple syntax and it only has 21 reserved words. It’s a fast, flexible, and robust programming language that was created in 1993 and gets its name from the moon.
What is a Script?
In Roblox Studio all of your code will be placed in a script. In programming, a script is a set of instructions that tell your game what to do. So if you want your player to pick up a coin, get a speed boost, or even save that player’s information, that all needs to be done through a script.
Different Types of Scripts
There are three types of scripts in Roblox Studio:
- Scripts – Simply called scripts, they are really the server scripts. Almost all of your scripts will be server scripts. These scripts run on the server.
- Local Scripts – These scripts are used to access client-only objects and can only be placed in certain locations of your Roblox game: Backpack, character model, PlayerGui, PlayerScripts, and the ReplicatedFirst service. If placed anywhere else they will not run.
- Module Script – This is a bit advanced but it’s good to know it exists. These scripts store information that you can call from other scripts.
For the purposes of this article, we will just be using a script associated with a part.
Add a Script to Roblox Studio
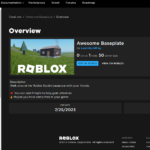
To write code in Roblox Studio you you first need to have Roblox Studio open and be in a game. Please check out our Intro to Roblox Studio if you are not sure how to download and create a game template.

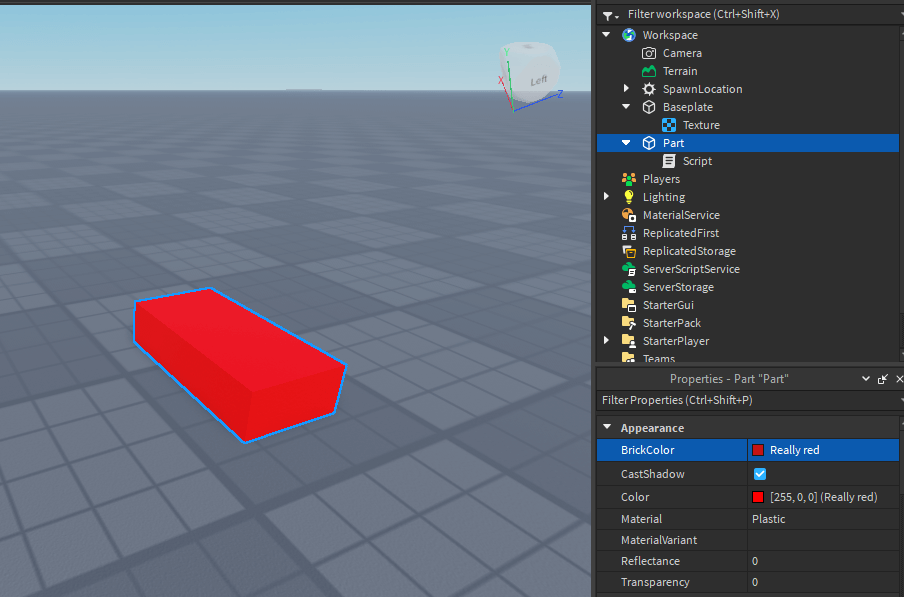
Once you are in Roblox Studio you need to add a part to the game. At the top of the screen make sure you have Home select. Now find the Part menu and select it to show the dropdown. Choose any part you would like to add, I chose Block.
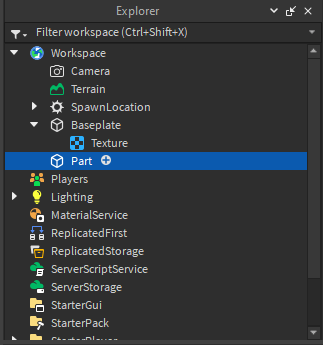
With your part now in the game you can either select it from the 3D Viewport or through the Explorer under Workspace as shown in the image above.
If you don’t see the Explorer window then at the top of Roblox Studio chose View and select Explorer on the far left. This allows you to show or hide the window.
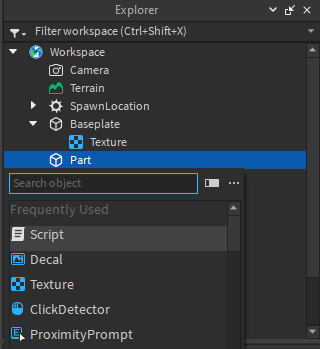
After selecting the plus (+) sign a menu should appear. Now chose Script by either typing the word into the Search Object field or selecting it from the Frequently Used list.
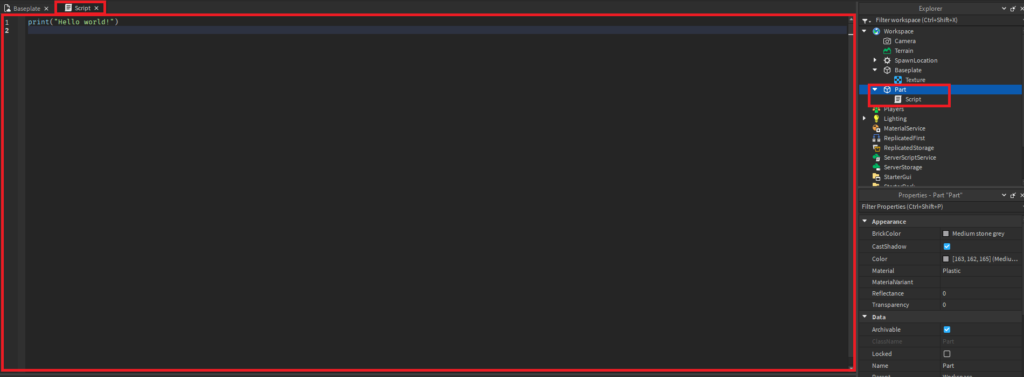
Once you select Script two things will happen. First, a new window will appear showing the script you just added and it will have a title of Script that you can see in the tab at the top of this window. Second, under the Part we just selected you will see the Script we added.
Default Lua Script – Hello World
Before we continue let me tell you about the default text that appears every time you create a new script: print(“Hello World!”).
The print function allows you to print text messages to the console. This is useful for debugging and keeping track of data while you are testing your game.

To see the output of this Lua code press the play button in Roblox Studio. There are a few places to find this button. First, at the top right of Roblox Studio you will see a small blue triangle to the left of the Home tab and to the Right of the File menu option. Another one can be found with the Home tab selected and over to the right near the test buttons.
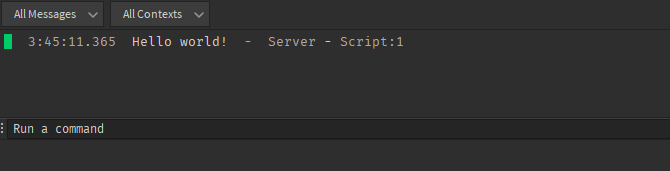
Once you run your game you will see the “Hello world!” message in your Output window. If you don’t see the Output window go to the View tab at the top of Roblox Studio and select Output. You should now see the message in this window.
Now stop the game. In the same location as the play buttons, you will also now see a big bright red square that is the stop button. Click that button to stop the game.
Write Your First Lua Code
The first thing we will code in Roblox with Lua is how to tell when a player touches an object (e.g. the Part we added) and once they touch it something should happen.
A common game type in Roblox is the Obby which is an obstacle course that players try to complete. Typically there are bad parts that if the player touches them their character is forced to respawn at the start of the obstacle and must try it again.
Please note that this example is meant to be a high-level overview of Lua coding in Roblox. If you want a more detailed, step-by-step guide to writing Lua code and creating games on Roblox check out our free course.
Let’s begin.

We are going to create a local variable named badPart. This means that the values of badPart will only be accessible inside of this script.
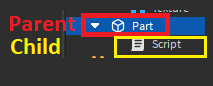
script.Parent means that the value of badPart is going to be Part, which is the parent of this script. The image above attempts to illustrate this. Because Script is inside of Part, it is considered the child of Part.
Next, let’s add a function. A function is a set of instructions bundled together for reusability so you don’t have to write the same code over and over.
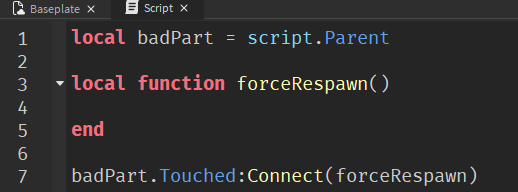
Here, we are creating a local function called forceRespawn(). You can name a function anything you like.
Now, as shown on line 7, we are going to add a Touched event to the badPart variable which points to our Part. We are going to connect this event so any time someone touches the part they will trigger the function forceRespawn().
A Touched event is a part of the program that listens for something to happen, in this case, it’s always listening to see if a player touches an object and then calls whatever is connected to it. In our case, we connected the forceRespawn function.
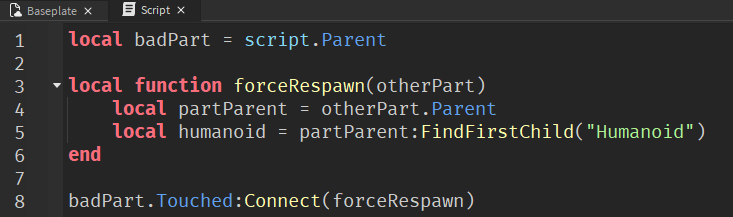
Let’s start building out our function. Note on line 3 we added the phrase otherPart inside of the parenthesis next to forceRespawn() so now it reads forceRespawn(otherPart).
We add two more local variables called partParent and humanoid. In your game when you want to manipulate the player you will commonly use the humanoid object.
Now that we have a humanoid variable we need to check one of its properties, the player health. First, we check if the variable humanoid is true which means that we were able to successfully find the player in the game. After that, we set their health to 0. This will make the player respawn. Congratulations, you just wrote your first code in Roblox!
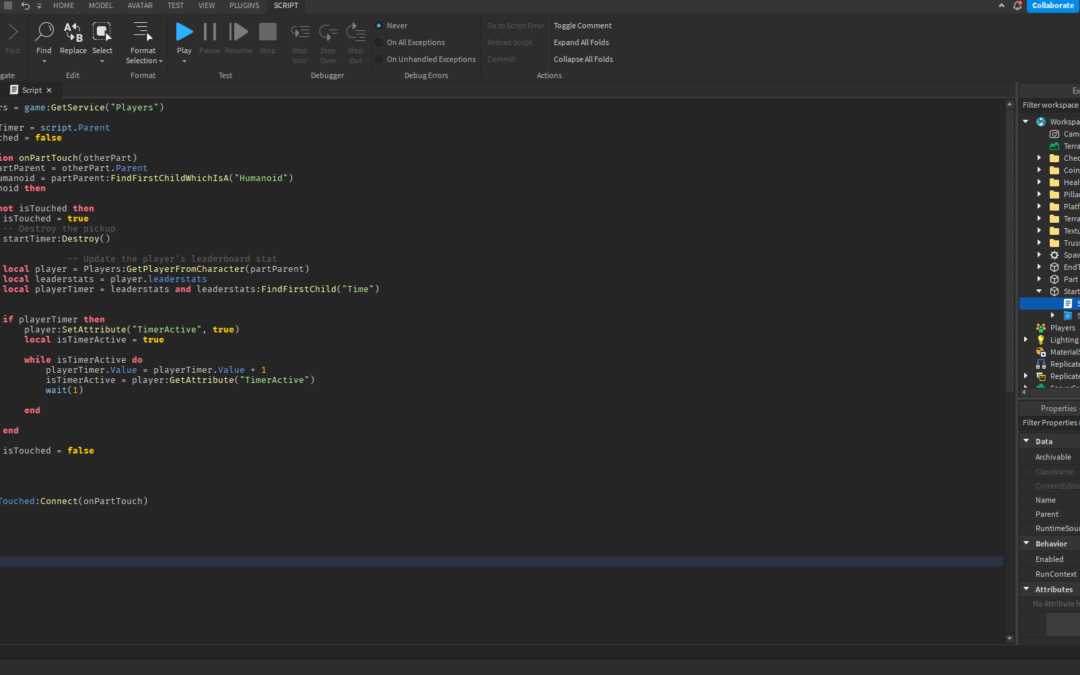
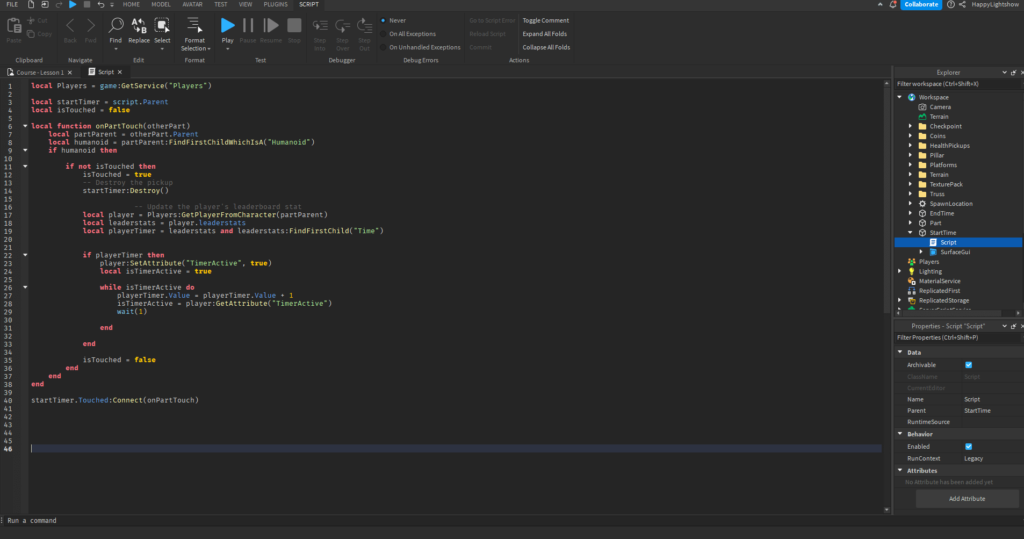
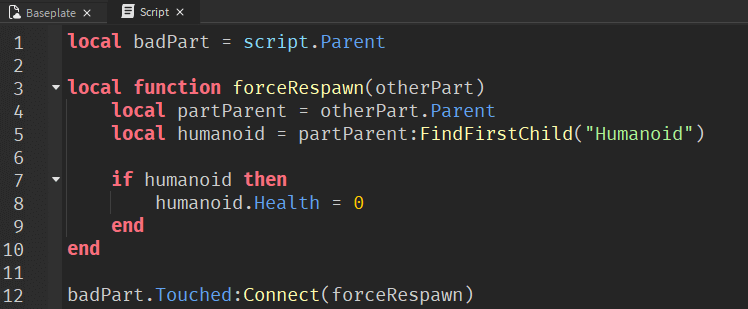
Here is the full script we wrote in case you need to copy it directly.
local badPart = script.Parent

local function forceRespawn(otherPart)
	local partParent = otherPart.Parent
	local humanoid = partParent:FindFirstChild("Humanoid")

	if humanoid then
		humanoid.Health = 0
	end
end

badPart.Touched:Connect(forceRespawn)
Test Your Code in Roblox
Just like we did when looking at the hello world print statement, let’s go ahead and press the play button. Now walk into the part you added to the game. Remember, I added a Block part but you might have added something different.
When you walk into the part your player will fall apart and after a few seconds will respawn. Congratulations, you created your first script!
Change the Part Color
We can add a few finishing touches to what we’ve done so far. First, let’s add some color to the part to give the players a visual cue that they shouldn’t touch it.
With the part selected go to the Properties window directly below it. If you don’t see a Properties window then go to the View tab at the top of Roblox Studio and then select Properties to show or hide it.
In the Properties window select the BrickColor option and choose Really Red, or any color you like. Now you’ve changed the color.
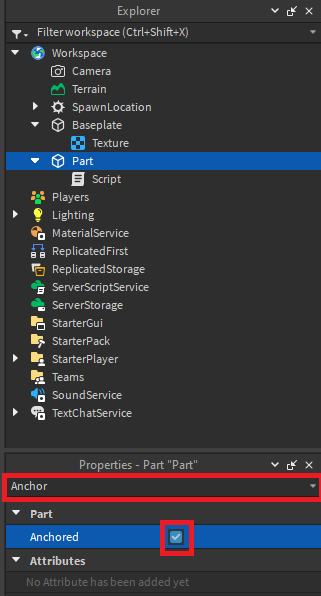
Finally, we want to anchor the part. What this does is locks the part in place so if you bump into it the part won’t move. With the part selected go to Properties and either scroll until you see Anchored or type Anchored into the search area within Properties. Make sure Anchored is selected.
Write Your Second Lua Script
Let’s modify our script to change the color of a brick instead of respawning the player. This will not only be more fun for the player but it will show you that once you know some simple lua script you can make small modifications that completely change what it does.
First, let’s create a brand new part. You already know how to do this but as a refresher you select the Home tab at the top of Roblox Studio and then choose a part from the Part dropdown menu.
Select your new part and this time we’re going to change the part name. When you create your own Roblox game you should always be organized and naming your parts, scripts, and other objects in the Explorer window is a must.
Right-click the new part and select Rename. Alternatively, you can double-click the part name and the field should become editable. Name this part anything you want.
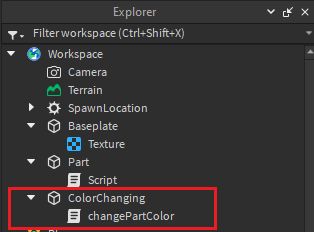
Now, select the plus(+) sign next to your part and add a script. Rename the script just like you did with the part.
To save time you can copy and paste all the code we previously wrote into our new file. Be sure to delete the Hello World part!
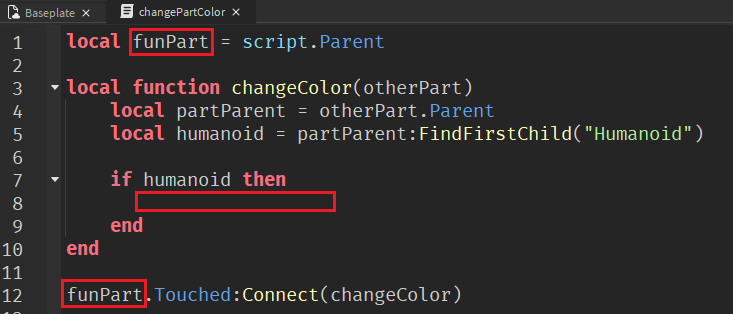
Let’s modify the current code, as shown in the image above noted by the three red boxes. First, we need to change the name badPart to funPart on line 1 and line 12. Line 12, the Touched event, references the local variable on line 1 so they need to have the same name.
Next, we remove the code on line 8 that sets the player’s health to 0. For now, leave this blank.
What we have here is the foundational code that executes when a player touches an object in the game. The main difference between them is going to be what we write in the IF statement on line 8. This will tell the game what to do when a player touches the part.
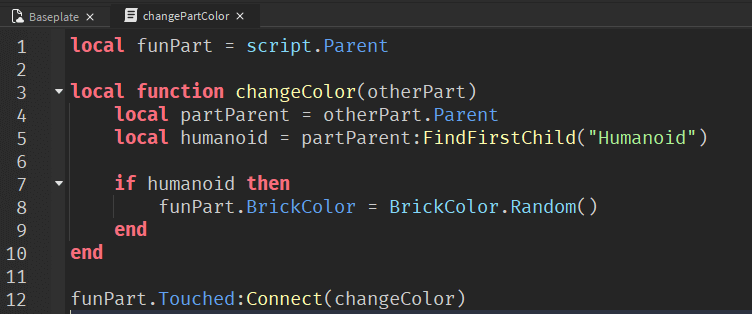
Now to add the final touch. On line 8 above we start by calling the BrickColor property of the part we named funPart. Almost all properties can be called and manipulated through Lua script. If you select the funPart in the Explorer window you should be able to check the Properties window and also see BrickColor there.
Once we call BrickColor we now want it to equal a new color. To keep this fun we are having the game choose a random color using BrickColor.Random().
If you wanted to choose a specific color you could replace Random with that color. For example, we could write the following code if we wanted to change the brick to blue.
funPart.BrickColor = BrickColor.new("Really blue")Here is the full script we wrote in case you need to copy it directly.
local funPart = script.Parent

local function changeColor(otherPart)
	local partParent = otherPart.Parent
	local humanoid = partParent:FindFirstChild("Humanoid")

	if humanoid then
		funPart.BrickColor = BrickColor.Random()
	end
end

funPart.Touched:Connect(changeColor)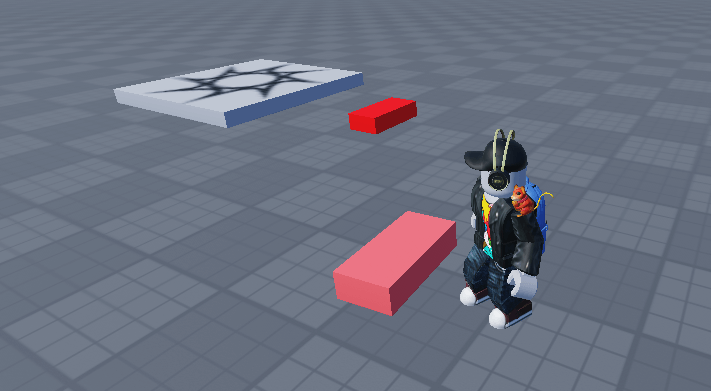
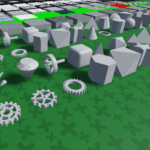
Let’s test out our code. Press the Play button in Roblox Studio and then walk over your brick. Is it changing colors? I bet it is changing lots of colors, how fun!
Create Games on Roblox
While we were able to successfully write a Lua script you probably still have a lot of questions, and that is understandable. This article wasn’t meant to be a deep dive into creating games on Roblox or scripting in Lua.
If you’d like to learn more about how to make games on Roblox, and how to write many more scripts in Lua, check out our course Create Games on Roblox.
It’s free with on-demand video tutorials that guide you through 2.5 hours of step-by-step instructions showing you everything you need to know to start making games. Check out the playthrough below to see what you’ll be making.
 Learn Roblox Studio