So you just made your first Roblox game? Great job! Now it’s time to think about how to publish your game on Roblox and make it public so the world can play with you.
Maybe that’s too much pressure and you just want to share your game with friends and family, that’s fine too. We’ll show you all the options available for publishing your game to Roblox and go through each setting to make sure your game page looks great.
Save Your Game
Did you know you can save your game without publishing to Roblox? While this guide focuses on publishing your game I did want to go over all options available to you.
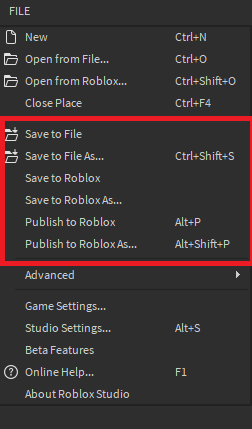
- Save to File – Saves directly to your computer.
- Save to File As… – Saves directly to your computer. It creates a new file with the new name you enter.
- Save to Roblox – Saves the game on Roblox servers, still only accessible to you through Roblox Studio.
- Save to Roblox As… – Saves the game on Roblox servers, still only accessible to you through Roblox Studio. It creates a new file with the new name you enter.
Remember, when you save your game, even on Roblox, it is not published. This means the only place you can access your game is from Roblox Studio.
It is still advisable to use the Save to Roblox feature as this keeps a copy of your game file safe on the Roblox servers. If you only use Save to File then the game is directly on your computer and if your hard drive fails then you lose all your work.
Publish Roblox Game
You have two very different options in Roblox Studio to publish your game.
- Publish to Roblox – Publish a new game to Roblox
- Publish to Roblox As… – Update (e.g. replace) an existing game. When you select this option you will see all the games you have access to and you can choose one to write over.
For your first game, you are going to want to select the Publish to Roblox option.
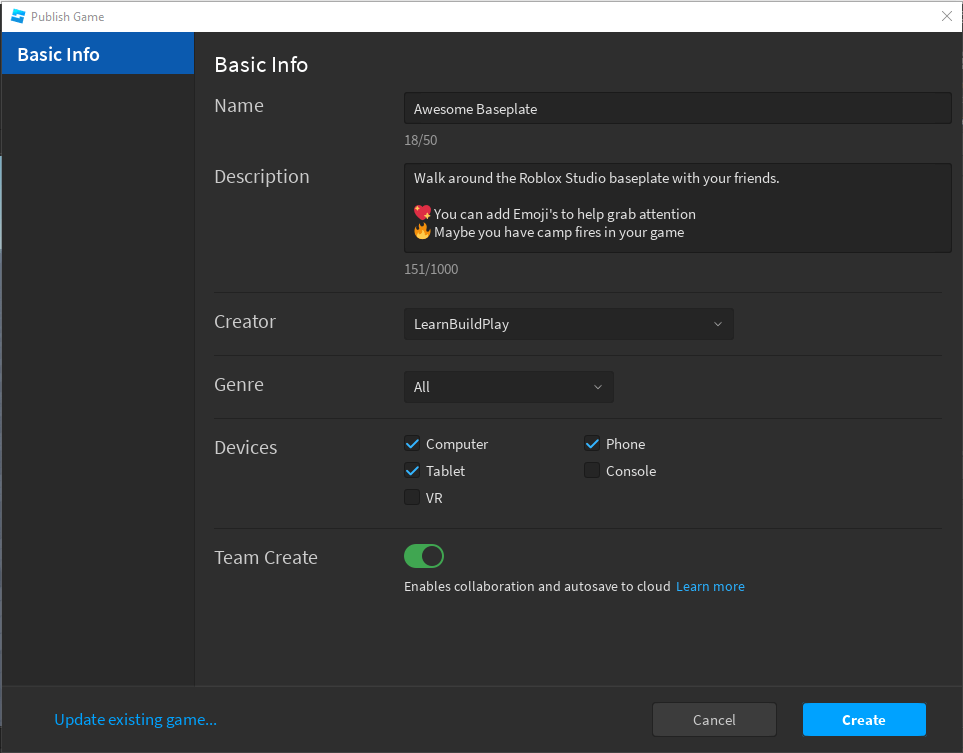
Although there aren’t a lot of fields to fill out here they are all important.
- Name – This will be the identity of the game and part of what people will search for when trying to find your game.
- Description – Describe what your game is. It’s usually a good idea to avoid walls of text. Keep the intro short and add some bullet points.
- QUICK TIP: You can use emojis in your description to add some fun to it. Sites like emojipedia are useful to quickly copy emojis.
- Creator – Once you chose a creator and publish your game, this can never be updated. More on this in a minute, don’t click that Create button just yet!
- Genre – If your game fits into one of these categories you can choose one, otherwise select All
- Devices – These are all the devices you want to support in your game. If you aren’t sure just leave the defaults selected.
Ok, back to choosing the right Creator for your game. Here are some simple guidelines.
- If you are just getting familiar with Roblox Studio, testing how publishing works, or creating something that is just for friends and family then choosing Me is fine.
- If you are creating a game and you want it to be played by hundreds, thousands, or even millions of players on Roblox then you should publish it as a group. Even Roblox advises that you publish games through a group.
Keep in mind that to create a group in Roblox it does cost 100 Robux. At the time of writing this, you can buy 400 Robux for $5.00. The reason it costs money is to prevent players from spamming and creating unlimited groups and not using them to help build the Roblox community.
Lastly, I should say there is technically a way to change the Creator after publishing a game. You would need to delete your current game and re-publish the game and choose a new creator. The downside of this is that in Roblox’s eyes, this is basically a brand new game. You lose all your likes, visits, favorites, etc. So you start back at 0 for your game.
This is really only a valid option if you just recently published your game and haven’t gotten a lot of players. Otherwise, you’re just going to need to keep it with the current creator.
Update Game Information

Although we have published our Roblox game it’s still not visible on Roblox. Before we change that let’s make sure all of our game information is correct.

By default, you’ll start on the Basic Info section of the Roblox Game Settings. There is a scrollbar on the right that might be hard to see. Let’s go through all options available to us.
- Name and Description you should have already filled out when we first published our game. Make any changes you like.
- Age Recommendation – You will need to fill out the questionnaire for this to populate. This will open up the Roblox Create Dashboard where you can take the survey. You can re-take this survey at any time.
- Game Icon – This is the icon players will see when looking through games on Roblox. Recommended resolution 512 x 512
- QUICK TIP: To make a great icon you can find a number of YouTube videos walking you through different programs that can accomplish this. However, you can outsource this on websites like Fiverr. People like Annie do a fantastic job making Roblox icons for games and groups.
- Screenshots & Videos – Upload screenshots and YouTube videos for your game.
- Genre and Playable Devices you have already filled out when we first published our game. Make changes if needed.
Once we have these basic settings filled out, we can now make our game public.
Make Your Game Public
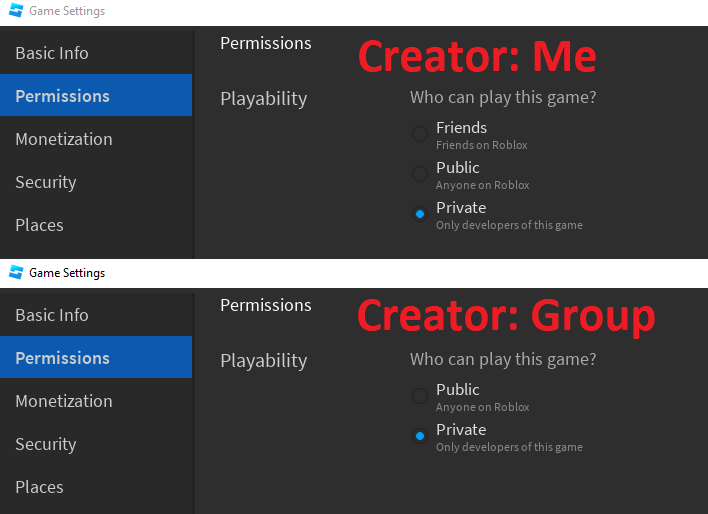
In the game settings chose Permissions. The options you see on the permissions page are determined by the creator you selected when you first published your Roblox game. The only difference is if you published the game as an individual (Creator: Me) then you can share just with your friends. A group only has the Public and Private option.
Regardless of the creator, let’s go ahead and select the Public option and then select Save. Your game is now open to the world!
Find Your Game on Roblox
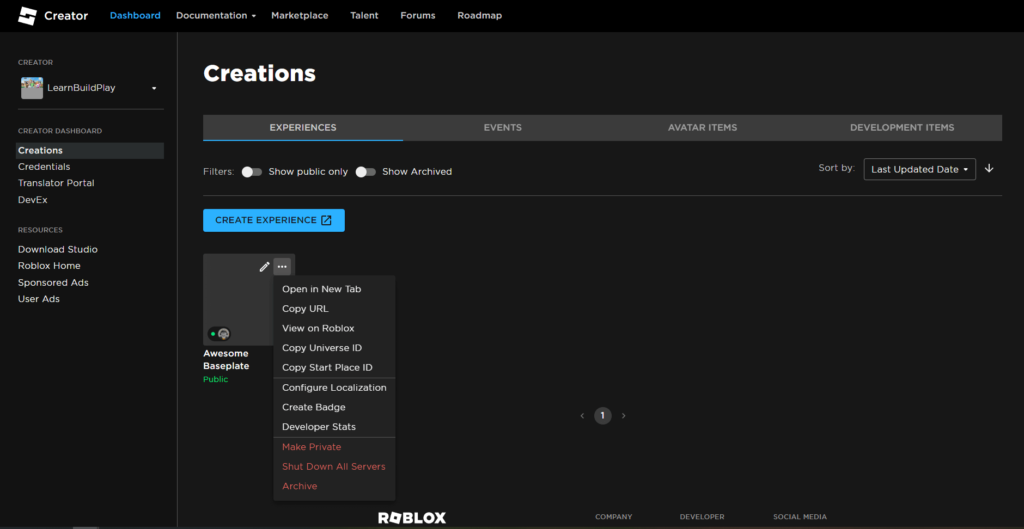
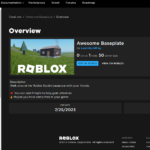
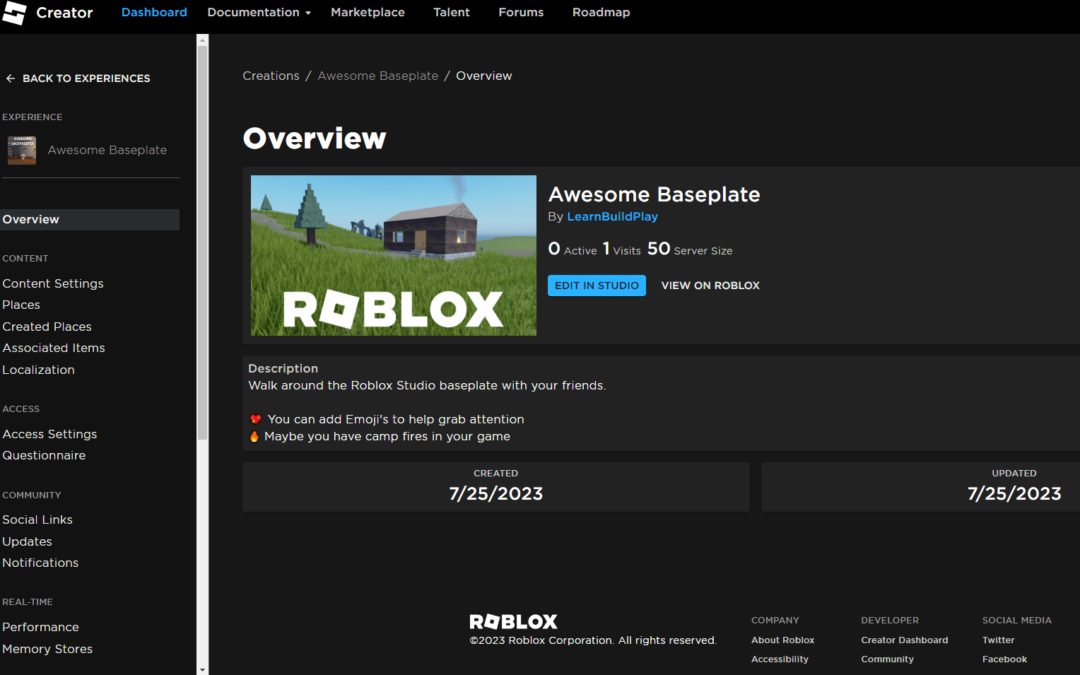
Once your game is published and has permissions set to public there are a few places to find it. One of the best places to look is in the Roblox Creators Dashboard.
When you go to the creator dashboard first select the creator that you published the game as. This would be either your personal account or if needed you can switch it to your group account in the dropdwon.
If you have a lot of games listed you can use the filters and choose Show public only. Your game should be listed below.
Select the three dots (…) and then choose View on Roblox.
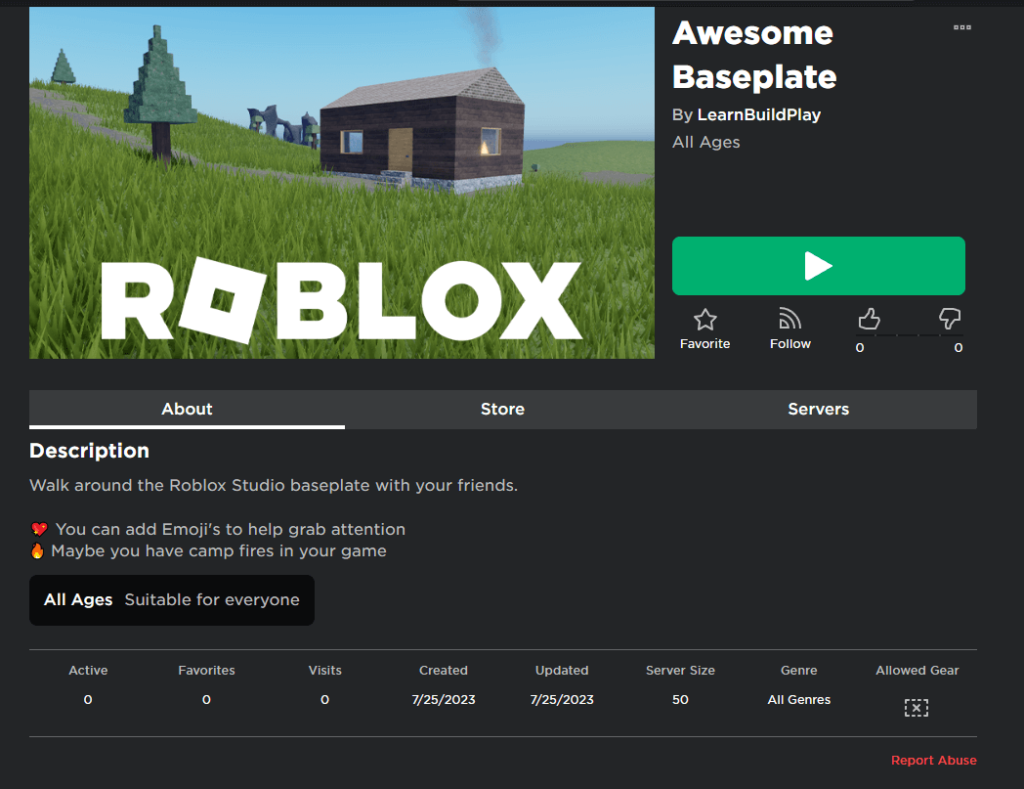
This is your game page that is visible to everyone on Roblox (since you made your game public). All you need to do is click the play button and your game will launch.
You can also see your games on your group page or your profile page.
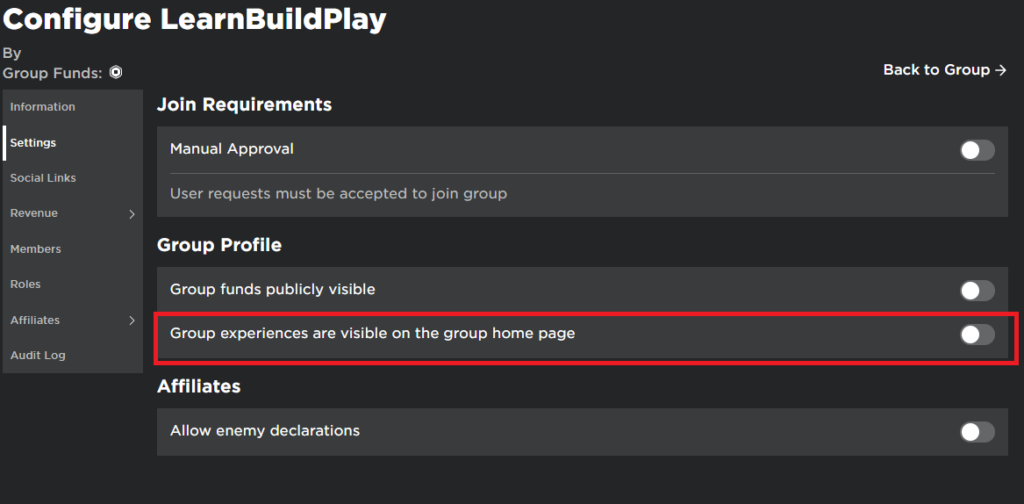
If you published through a group you need to visit your group page and then click the three dots (…) at the top right and select Configure Group. Go to Settings and then find the option that allows the group experiences to show up on the group home page.
Now when you visit your group page you will see your game listed.
If you published the game as your user then visit your Profile and select Creations. You should see your public creations listed there.
Share Your Game on Roblox
When you view your game page on Roblox you can then copy and share the URL in the browser with others. That is an easy way for you to share your game.
Roblox.com/games/<your game id>/If you published as a group you can share or invite people to join your group and they will be able to see your game under group experiences.
Finally, if you are actively playing your game you can invite people from your friends list to join your game directly.
Server Size and Server Settings
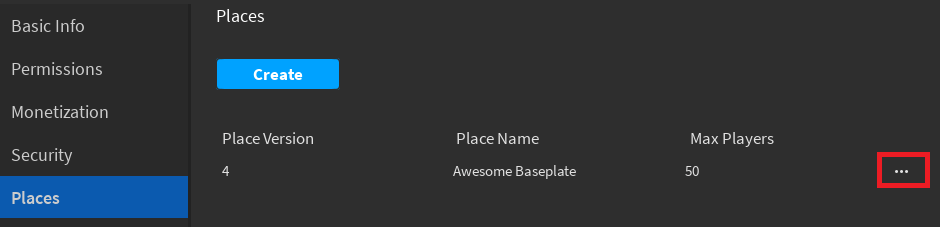
By default, max players on a server is 50. To change this and a few other settings go to your Game Settings and chose Places.
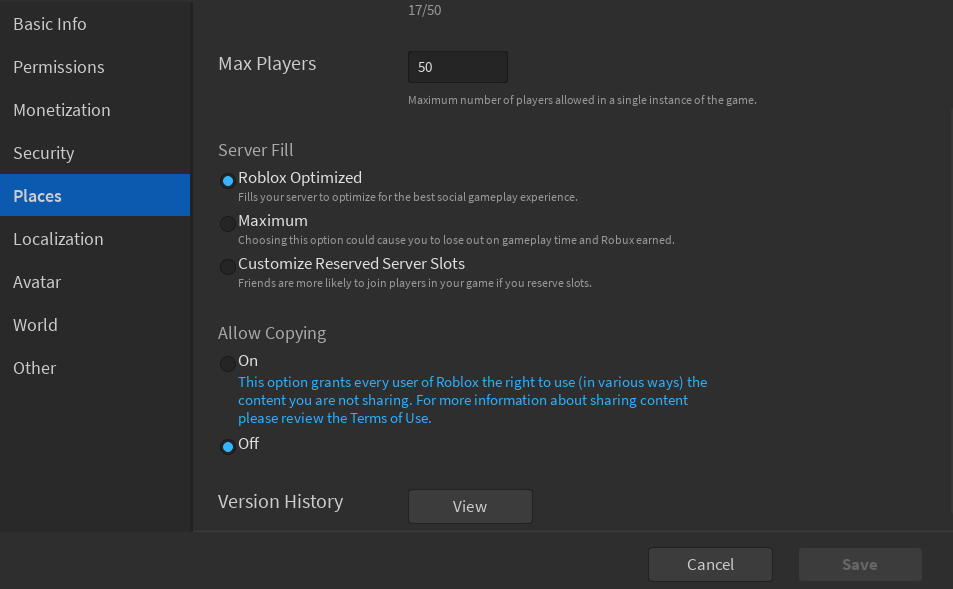
Here you can update your max players allowed to join a game. Keep in mind this is how many players can join the same game at a time. You will have multiple servers running so don’t worry about that, Roblox handles everything server related.
For Server Fill you should just leave it optimized unless you have a reason for changing it. I would also leave Allow Copying to Off. The only reason I’d turn this on would be for sharing a tutorial game where you want people to look at all your code and copy it to learn.
Revert to a Previous Version
One of the many great reasons why you should be making games on Roblox is they keep a backup of every saved version of your game. This way you can easily revert your game back to a different version if you notice something is terribly wrong.
There are two ways to see your version history.
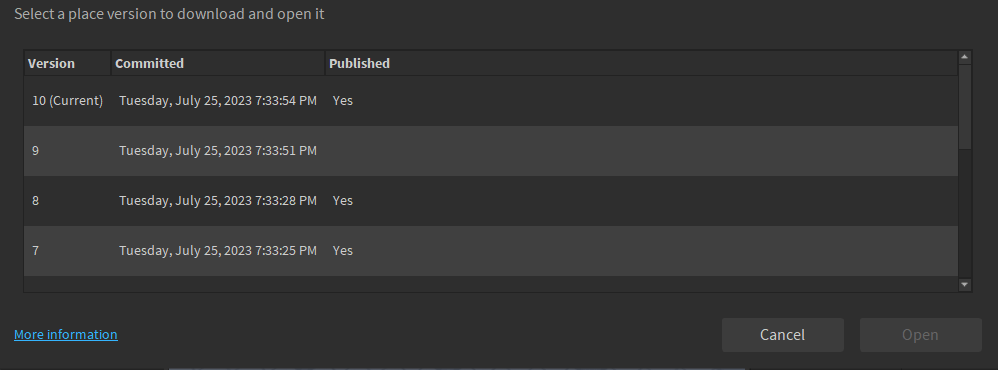
The first way should be in a familiar location for you. Go to your Game Settings, navigate the left menu and select Places, then click the three dots (…) to the right side of your place version. Then, select Version History.
Notice that it shows you whether a saved version was published or not. This can also be helpful to understand which versions your players are on versus development version.
Another way to access your Version History is to go to View, select Asset Manager, click the menu icon within the asset manager then select Places. Now you can right-click your place and select Version History.
Restart Servers
There might be a time when you want to shut down your game servers. Keep in mind that when you shut down your server it kicks all players out.
Typically you’d only want to do this after a major update to your game and ideally let your players know in advance so they expect it.
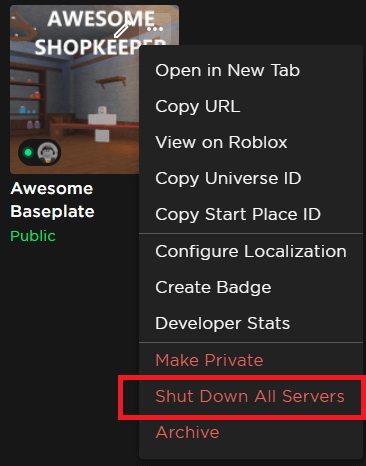
To shut down all instances of your game visit the Roblox Creators dashboard and click the three dots (…) at the top of your game icon. In the menu that appears, you will see the option to Shut Down All Servers.
Assuming you’ve already published the latest version of your game prior to shutting down all servers, there is nothing else you need to do. Next time someone tries to play your game a new server will start using the latest build.
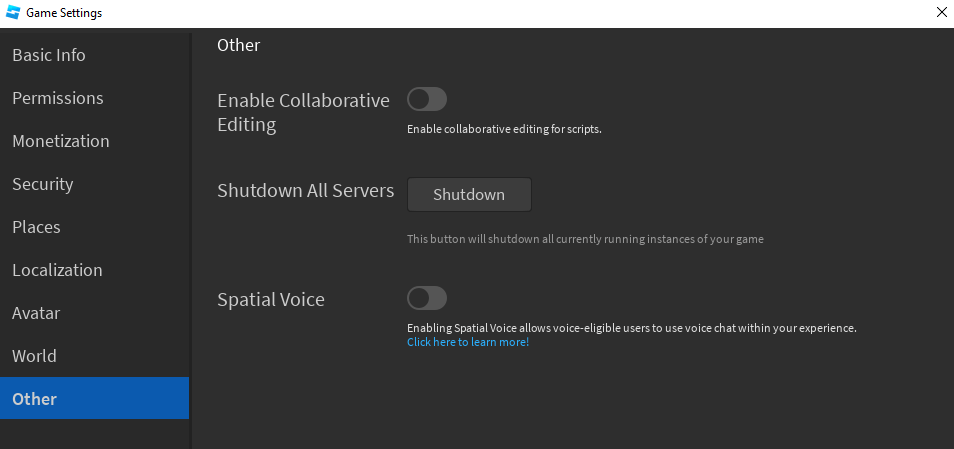
Note that like most things with Roblox and Roblox Studio, there is more than one way to do something. You can also shut down all servers directly in Roblox Studio by going to the Game Settings, selecting Other in the left navigation menu, then selecting Shutdown All Servers.
Allow Other People to Create Games With You

On the Roblox Studio Toolbar you will see a big blue button that reads “Collaborate” on the top right of the screen.
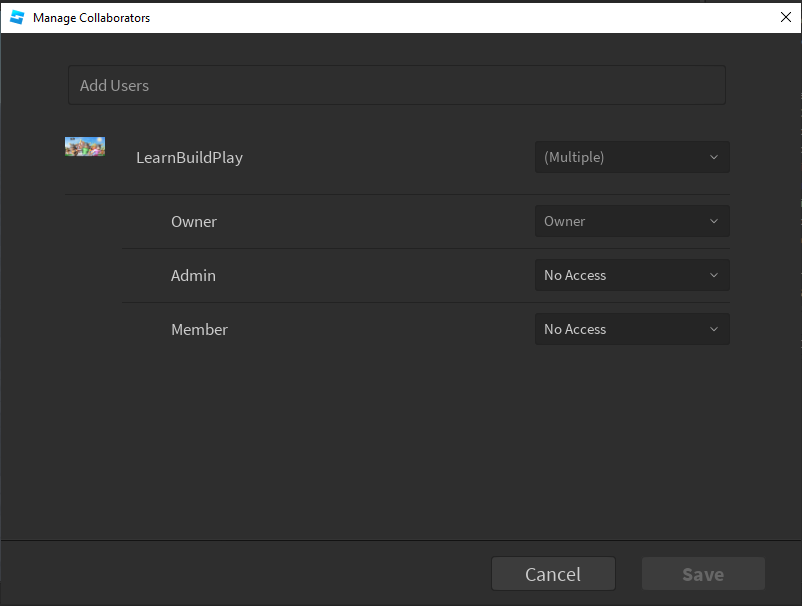
What you see in the Manage Collaborators section depends on whether you published as yourself (Me) or as a group. The image above shows the game published as a group.
Here are the differences between collaborators for publishing as yourself and publishing as a group.
- Publishing as Me
- You can only invite players that are on your friends list to your game
- Once you add friends to the game you can edit their permissions
- Play – Can play the game
- Edit – Can play and edit the game
- Publishing as a Group
- You can invite friends to the game but they can only play the game. Friends you add can not have edit roles
- The Owner of the group has full edit and play permissions, this can not be changed
- You set the permissions for Admin and Members. By default, they have no access.
- No Access – Cannot play or edit the game
- Play – Can play the game
- Edit – Can play and edit the game
Access Games Shared With You

It’s easy to find Roblox games that are shared with you. With Roblox Studio open, click on My Games on the left menu bar and then select the Share With Me tab.
Here, you will see any games that have been shared with you.
Creator Dashboard
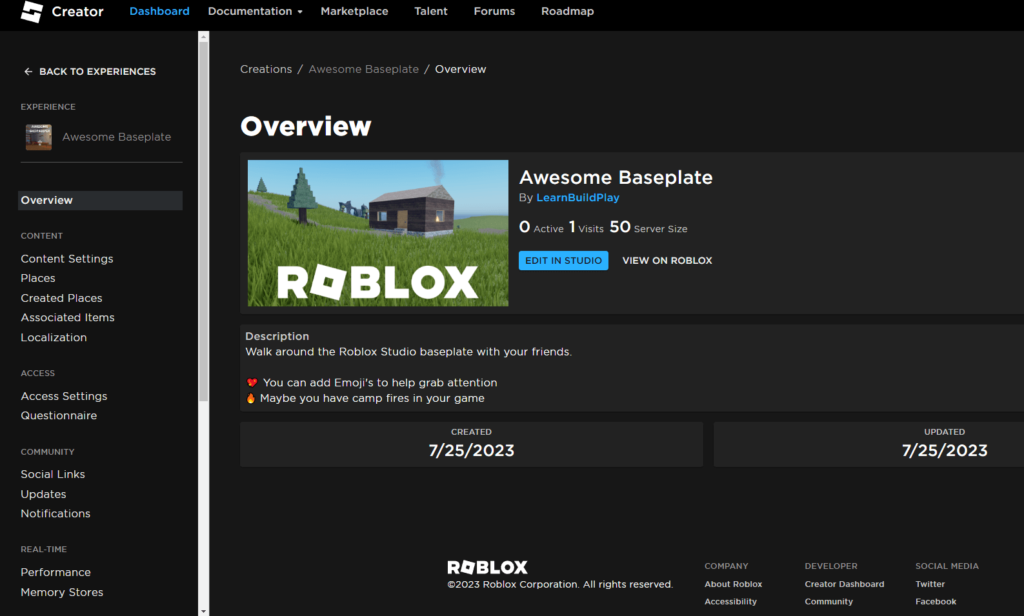
As you’ve seen throughout this article, there is more than one place to view information about your game, published or otherwise. The Creators Dashboard is a great asset that helps developers keep an eye on their games.
Selecting one of your games will take you to the game overview page and change the left menu showing you different areas related to your game. Within these menus you’ll find information about active users, retention rates, monetization, and you can also create badges and passes for your game.
While we won’t get into all of the details in this article I recommend spending a few minutes on your own clicking around to see what all is offered.
You Published Your Roblox Game
Well done. You have published your Roblox game and are now aware of all the fields related to publishing games. We hope this is the first of many games you will create and publish.
Now that your game is published check out how you can get more players into your game and keep them coming back.
If you’re still starting your journey with developing games on Roblox or know someone who is interested in starting, you can check out our free Roblox development course.
The on-demand video course walks you through everything from installing Roblox Studio to writing your first Lua scripts, all the way through saving player data on the server.
 Learn Roblox Studio