Roblox Studio is a very welcoming tool for new developers of any age. It’s easy to learn the layout of the user interface and the basics of creating a game in Roblox Studio. In just a matter of minutes, you’ll be able to drop in objects, press play, and run around your very first experience. Yes, it’s that easy! This article will walk you through everything you need to know to get started.
If you prefer to learn by watching videos you can jump into the second lesson of our Create Your First Roblox Game called Roblox Studio Crash Course. This is an in-depth 7-minute video showing you everything you need to know to get started with Roblox Studio.
What is Roblox Studio
Roblox Studio is a free tool created and maintained by Roblox that allows you to create games for Roblox. In programming terms, it’s considered an integrated development environment (IDE) which is a fancy way of sayings it’s a development tool. Roblox Studio is considered an all-in-one tool because it can perform every aspect of game development without needing multiple programs. Roblox Studio allows you to create your world, create models (think trees, houses, animals, etc.), scripting, and so much more.
How Much Does Roblox Studio Cost
It’s free! The great thing about the Roblox ecosystem is that essentially it’s all free. To make games with Roblox Studio costs you nothing, Roblox Studio is free. Creating a Roblox account and playing games on Roblox is also completely free. You will need a Roblox account to sign into Roblox Studio but we cover that in upcoming sections of this article so keep reading.
Download Roblox Studio
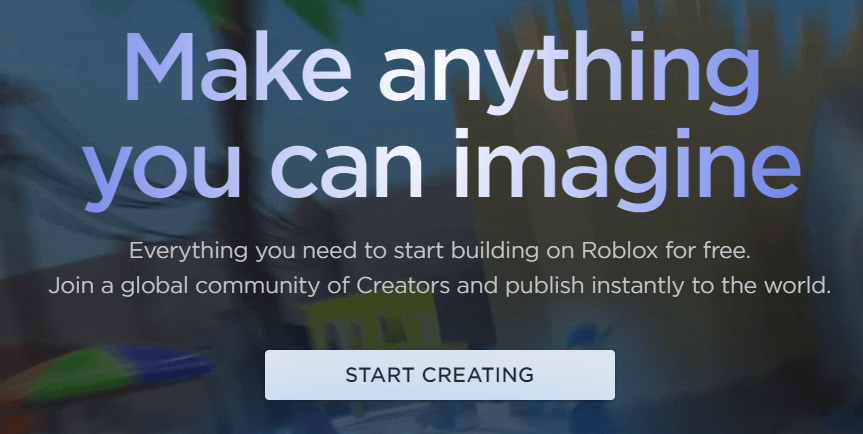
The best way to learn something new is to learn by doing, by being hands-on. With that in mind, the first thing you should do is download Roblox Studio. You can download Roblox Studio by visiting create.roblox.com. Once you visit this site you’ll see a giant button that reads “Start Creating.” Click that button and a popup will appear and ask you if you want to download Roblox Studio. Select Yes. Most likely you’ll see the download appear at the bottom of your browsers or you may need to visit your downloads folder. Click the installer and install Roblox Studio.
Create a Roblox Account
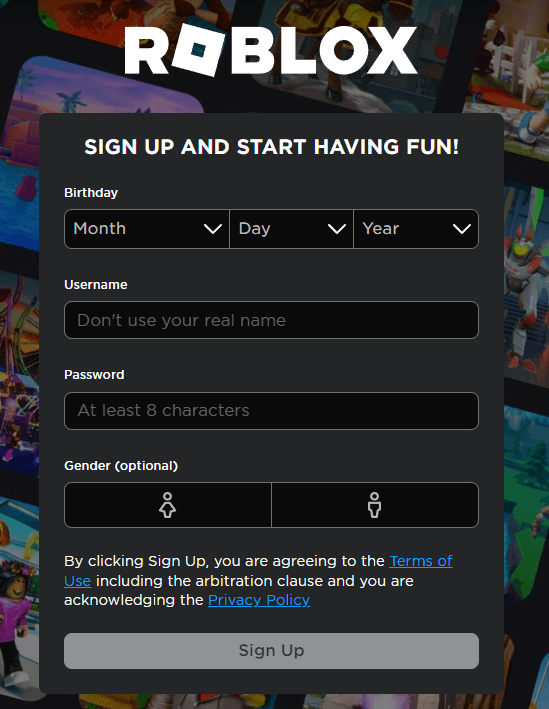
In order to use Roblox Studio you’ll need to have an account, the good news is that it’s free. If you already have an account that you’ve used before to play games on Roblox you can just use that account. If you have never joined Roblox before then head over to Roblox.com and fill out the information on the sign up page.
Roblox is very unique in the fact that you do not need an e-mail address to create an account. This makes it very easy to sign up but please be aware that if you forget your password there is no way for Roblox to help you get into your account without an e-mail address. So I suggest that as soon as you create and sign into your account on the Roblox website you select the setting (cog icon) in the top right corner of the web page, select Settings. At the top of your Account Info section you will see the Email Addess section. Add your e-mail and they will send you a verification e-mail. This will help you recover your account if you ever forget your password.
Open Roblox Studio
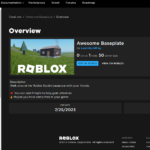
Once you launch Roblox Studio for the first time you’ll need to sign in with your Roblox account that you just created in the previous step. After you sign in you’ll be greeted with a new screen.
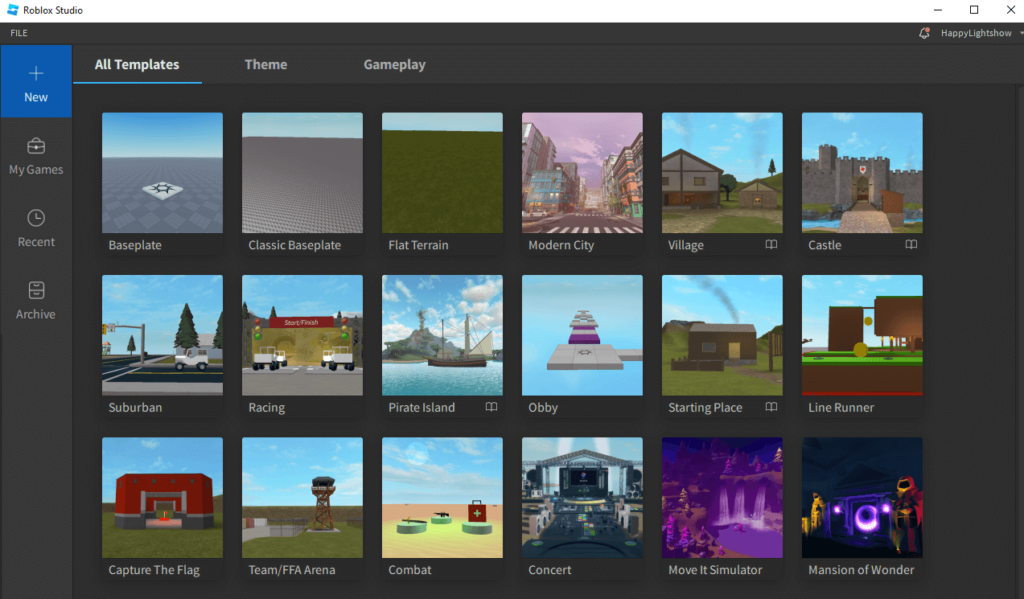
On the left side of the screen you’ll see a few options:
- New – This is where you create brand-new games. You have different templates you can choose from or simply create a blank baseplate.
- My Games – This is where you can see already created games. Once you select this you’ll see new options at the top.
- My games – These are games you have created
- Group Games – These are games created by a group Roblox Group you have created or joined
- Shared With Me – These are games that have been shared with you by another Roblox user. This is different from published games that you can join, this game has been shared with you so that you can access it via Roblox Studio and develop it with another person
- Recent – This organizes games you’ve opened in Roblox Studio by recent date. This is very helpful once you have a lot of games and you can’t remember exactly which game or idea you were working on
- Archive – When you no longer want to work on a game and get it off of your My Games list you can right-click them and choose the archive option. All archived games show up here.
On the top of the screen you’ll also see a few options:
- All Templates – Shows you all available templates
- Theme – Show you templates based on themes: Modern City, Village, Castle, Suburban, Pirate Island, Starting Place, Concert
- Gameplay – Shows you templates based on gameplay: Racing, Obby, Lite Runner, Capture The Flag, Team/FFA Arena, Combat
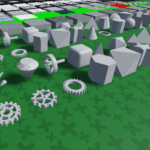
While I recommend exploring existing game templates to get ideas on how certain games work, for now we’re just going to choose Baseplate.
Roblox Studio User Interface
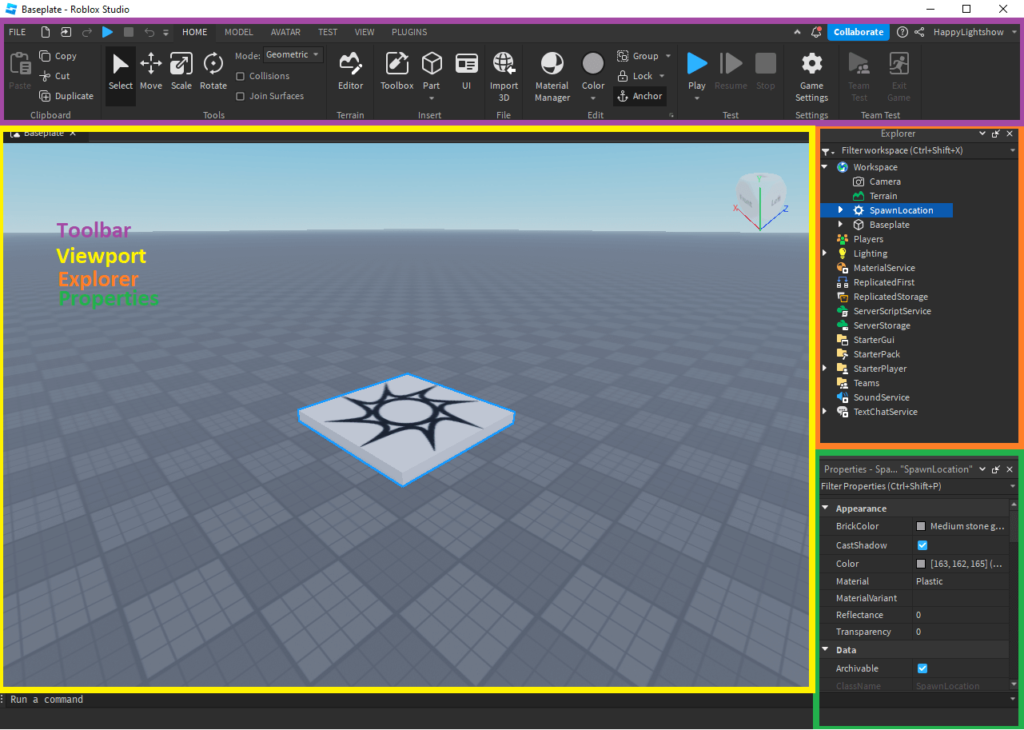
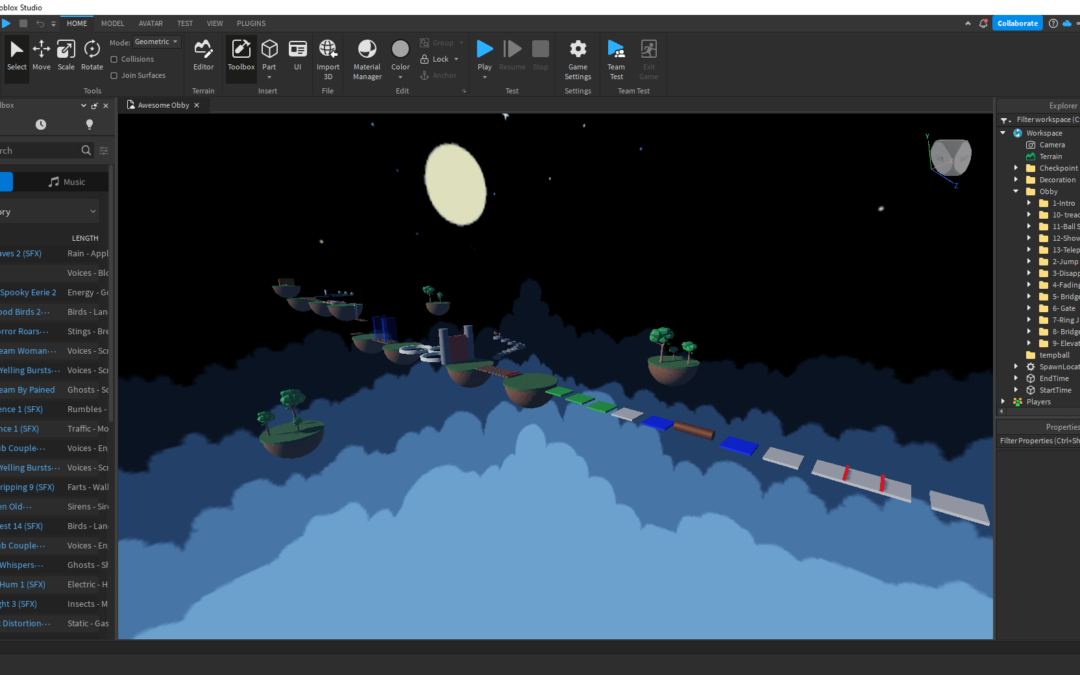
When you open Roblox Studio for the first time your screen should look very similar to what is shown in the above screenshot: Toolbar, 3D Viewport, Explorer, and Properties windows. Let’s explore each of these in more detail.
Toolbar

The toolbar is at the top of Roblox Studio. You’ll notice that at the top of the toolbar you’ll see some additional tabs: Home, Model, Avatar, Test, View, and Plugins. When you select one of these tabs it changes all the options you see below the tabs.
- Home – This is where you’ll find the tools to manipulate 3D objects in your game. You can add a part to your game by selecting Part and then choosing which shape you want to add to your game. Next, you can use one of the four main tools to manipulate that part: Select, Move, Scale, and Rotate. I highly recommend checking out Roblox Studio Crash Course to see this in action.
- Model – More advanced options for manipulating 3D game objects in the workspace. You can create more detailed models, add physical constraints, and even add effects like fire, smoke, and light to name a few.
- Avatar – Allows you to add accessories to characters, import meshes, and create animations
- Test – A very helpful place to help you test your game. You can simulate multiple clients and emulate devices like phones so you can see how your game will run on mobile.
- View – Here you can update the interface in Studio as well as additional display features. I suggest selecting and showing the “Output” so you can see any errors that come up while developing. This is discussed in more detail in the Roblox Studio crash course video.
- Plugins – You can manage your plugins here. These plugins extend Roblox Studio functionality and are created and maintained by the user community.
3D Viewport
This is your game. What you see here is what users will see when they enter your game world. Another way of saying this is that this represents your Workspace, which is shown in the Explorer and we’ll also cover that more later.
Since the 3D Viewport is your game you are able to move the camera around and interact with the world you’re building. Here are the camera controls so you become familiar with moving around.
| Keys/Shortcuts | Action |
|---|---|
| W A S D | Moves the camera forward/left/back/right. |
| Q E | Moves the camera down/up. |
| Shift | In combination with any movement key, changes the camera speed. |
| F | Focuses the camera on a selected part. This is helpful when you have a large game world. |
| Right Mouse Button | When pressed, dragging the mouse moves the camera view around. |
| Mouse Scroll Wheel | Zooms the camera in or out. |
| Middle Mouse Button | When pressed, dragging the mouse pans the camera. |
Explorer
The Explorer shows you all the parts that make up your game. Everything that you see in the 3D Viewport can be found directly under the Workspace. The Workspace is, essentially, your game.
The explorer contains much more than what your player can see though. There are many items you will find here like your lighting, server storage, sounds, and players.
The Explorer is also a powerful place. Just as you can add items to your workspace from your toolbar you can highlight Workspace, or an item within it, and select the “+” symbol that shows up. This allows you to add a number of items either directly to the world (such as a shape) or something to an already existing object (a script, a fire effect, etc.). You can also right-click anything under Explorer to see additional options.
When you select something in the Explorer window you’ll notice it will populate your Properties window.
Note: If you accidentally close this window you can re-show it by going to the top of Roblox Studio, select View, and then select Explorer.
Properties
The Properties window is also very powerful. Every item in Roblox has some sort of properties associated with it. Whether you select an item directly from the 3D Viewport window or you select an item from the Explorer, it will always populate properties.
Note that the properties will be different for different items. For example, the properties of a Block are much different than the properties of the SoundService. It’s a good idea to take time and look over properties when you’re working with something for the first time. When you first add a Block to the workspace you can select the Block and see that it has a color property you can change.
Note: If you accidentally close this window you can re-show it by going to the top of Roblox Studio, select View, and then select Properties.
Toolbox

Not to be confused with the Toolbar, the Toolbox allows you to directly insert models, images, meshes, plugins, videos, fonts, and audio made by Roblox or the Roblox community members. To see the Toolbox go to View then on the left just beside Properties you’ll see Toolbox, select it.
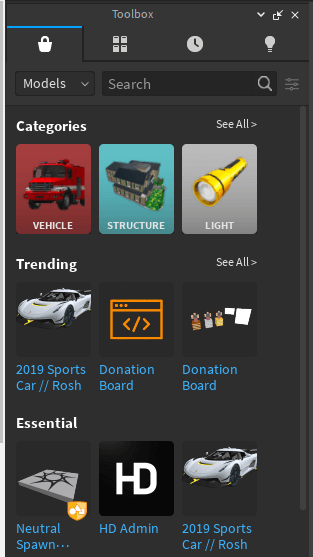
With the toolbox showing you can quickly add models and other items directly to your game. Just use the search (maybe search “trees”), then select the item you want.
We dedicate an entire article to showing you the best Roblox asset packs for new developers.
Warning: Adding models when you’re new to Roblox Studio does carry risks. Anyone can upload a model and some with scripts could have malicious code. This could crash your game, redirect your users to external games, among other things. For an in-depth video on how to use assets safely check out our lesson on Assets.
Quick Tip: In general, the best way to be safe is to either (1) only use assets WITHOUT scripts, or (2) Beside the search bar select filter and in the Creator field type “Roblox” then select “apply”. This will show you assets that have been uploaded by Roblox. Stay safe!
Add a New Part
While this guide is focused on getting you familiar with the interface of Roblox Studio I do want to at least tell you how to add your own part to the game. On the Toolbar make sure Home tab is selected then select Part and choose a shape, I chose Block.
Also on the Home tab, where the tools are, select “Select”. This allows you to select the part you just added. Select the part, you’ll see it highlighted in the Explorer and also you’ll see the Properties for the part are populated.
If you don’t want a part to move when someone runs into it (it would be strange if you had a lamp post that got knocked over as soon as you touched it) then under properties find “Anchored” and make sure it’s checked.
To move the object into the air (e.g. make it float), under the tools select Move. With the part selected, you’ll now see arrows, left click and drag them in the direction you want the part to move.
To make the part bigger or smaller, select the Scale tool. Left-click and drag the balls in the direction you want to manipulate the part. Tip: Hold shift while you click and drag to keep its size relative.
To rotate the part, select the Rotate tool. Like the other tools, left-click and drag to manipulate it.
This was an extremely condensed version of how to manipulate objects in Roblox Studio. For more in-depth direction please check out the Roblox Studio Crash Course where I go into a lot more details on adding and manipulating basic parts.
Test and Play Your Game
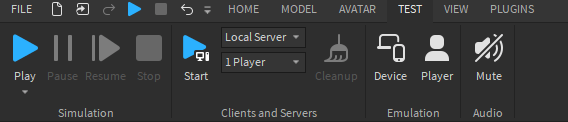
An amazing thing about Roblox is that as soon as you create a brand new game, you can instantly play it! Of course you might want to add something for players to do, but still it is amazing you can instantly jump right in. Go to the Test tab and then select Play.
You can move around using AWSD and the mouse. Try adding some objects for you to interact with.
To stop the test go back to the test tab and select the red Stop button. Note, anything you add to the game while you’re testing will not be saved so remember to exit the test before adding new objects or updating scripts.
Quick Tip: There is a difference between the Simulation –> Play and the Clients and Servers –> Start. For quick and easy local testing I’d suggest just using Play. When you want to see how your game works with multiple people select the number of players from the player dropdown and then choose Start. This will start a game with however many players you specified.
Save and Publish Games
In Roblox Studio, top left, select File. You’ll see the following options.
- Save to File – Save the game locally to your computer. Keep in mind this is saved locally so if your computer hard drive fails you’ll lose everything.
- Save to Roblox – Save the game to Roblox’s cloud storage. This game is still only accessible to you but it is safely in the cloud. This does not update any existing published game.
- Publish to Roblox – Save and publish the game to Roblox. This will update the live game.
Create Your First Roblox Game
Now that you feel comfortable with the Roblox Studio interface it’s time to take the next steps towards creating your very first Roblox game. Our free course, Create Your First Roblox Game, walks you through the creation of 13 different obstacles your players will have to overcome to reach the end. The course will teach you how to write Lua scripts, add leaderboards, save player data, create checkpoints, add music, touch events, in-game buttons, programming fundamentals, and so much more. In total, there are 2.5 hours of instruction over 21 video tutorials and all of it is on-demand so you can watch when you want to. This course is the best way to jump-start your Roblox game development journey.
 Learn Roblox Studio